How do I properly install and use a chemical anchor (injection mortar)?
A correct installation process is essential to ensure the bonding strength and overall safety of a chemical anchoring system. Unlike general adhesives, chemical anchors require precise application to achieve optimal performance. Below are the five key installation steps recommended by Good Use, suitable for various base materials including concrete, brick, and stone.
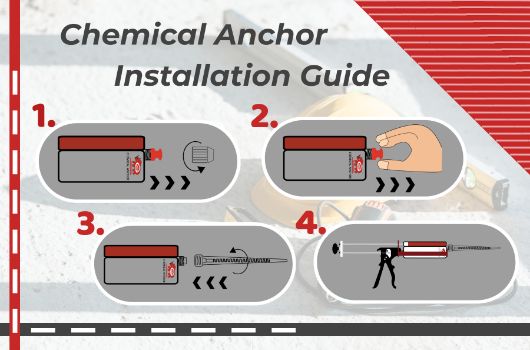
➤ Step-by-Step Chemical Anchor Installation Guide
Step 1: Drilling the Hole
• Drill the hole in the base material (concrete, brick, stone, etc.) to the specified diameter and depth based on the anchor size.
• For hollow base materials, use nylon sleeves to retain the resin and support the anchor rod.
Step 2: Cleaning the Hole
• Blow out the dust using a blow-out-pump or air compressor.
• Brush the hole with a steel brush to remove loose particles and debris.
• Blow again to ensure the hole is completely clean and dry.
• Repeat the blow-brush-blow cycle at least twice for best results.
This is one of the most critical steps. Poor cleaning = weak bonding!
Step 3: Injecting the Resin
• Remove the cartridge cap and attach the static mixing nozzle firmly.
• Load the cartridge into a compatible high-thrust manual or pneumatic dispenser and start dispensing.
• Discard the first 10~20cm (4~8 inches) of extruded resin, which may not be fully mixed.
• Inject resin from the bottom of the hole upward, pulling the nozzle out slowly to avoid air gaps.
• Fill about 2/3 to 3/4 of the hole with resin.
Step 4: Inserting the Anchor Rod
• Insert the threaded rod, rebar, or bolt with a slow, twisting motion to ensure full contact between resin and steel.
• Do not move or remove the anchor after insertion.
Step 5: Curing Time
• Refer to the product's technical data sheet (TDS) for gel and full curing times.
• Do not apply any load or stress to the anchor until it has fully cured.
• In colder conditions, curing may take longer. Always verify based on the resin's specifications.

How to Use Chemical Anchors - Proper Installation Is Key to Safety and Performance
Correct handling and installation of chemical anchors is not just about construction quality. It directly impacts the long-term safety and structural integrity of your project. Watch our installation video to learn the essential steps, best practices, and expert tips to ensure a successful anchoring process.
➤ Application Notes for Chemical Anchor and Rebar Installation
• Suitable for concrete, hollow brick, perforated brick, lightweight block.
• For hollow brick, using a nylon sleeve ensures the resin forms a solid plug and prevents expansion cracks.
• High-temperature or low-temperature variants are available for special conditions.
• Always check the compatibility of the resin with the base material and anchor type.
• Always follow engineering specifications or local building requirements for minimum spacing and edge distance to avoid concrete cracking or load reduction.
➤ Common Chemical Anchor Installation Mistakes to Avoid
• Using incorrect drill diameter or depth
• Inadequate hole cleaning (most common failure cause)
• Not discarding unmixed resin at the beginning
• Installing in wet or water-filled holes with incompatible resin
• Moving the rod before curing is complete
• Using a standard gun instead of a high-thrust dispenser (leading to poor mixing)
➤ Recommended Tools for Chemical Anchor Installation
• Blow-out pump or compressed air for hole cleaning.
• Steel brush for debris removal.
• High-thrust manual or pneumatic dispenser (match cartridge size).
• Gloves, goggles, and proper personal protective equipment.
➤ Chemical Anchor Installer Quick Checklist
✓ Hole drilled to correct diameter & depth
✓ Hole fully cleaned (blow–brush–blow cycle)
✓ Resin injected bottom-up with no air pockets
✓ Curing time fully respected before loading

Proper Installation of Chemical Anchors Requires Trained Professionals
To ensure structural safety and long-term durability, chemical anchor installation should be performed by trained and competent professionals. While our products are designed for ease of use, installers must strictly follow technical documentation and standard procedures, including drilling, hole cleaning, resin injection, anchor insertion, and curing. For structural, heavy-load, or seismic applications, it is essential to comply with local engineering codes and perform proper design calculations with qualified engineers. Load capacity depends on multiple factors, including base material condition, embedment depth, installation quality, and curing. Consulting a certified engineer before applying service loads ensures the anchoring system meets safety and performance requirements, providing professional-grade reliability and confidence in your project.

Pre-Installation Anchor Pull-Out Test - Improve Rebar Anchoring Quality
We strongly recommend conducting a trial installation or pull-out test under actual jobsite conditions to verify performance before proceeding with full-scale application. This is especially important when working in extreme temperatures, on wet or damp substrates, with hollow base materials, or on projects that are structural or seismic-critical. Performing these tests ensures the anchor's reliability and helps prevent potential installation failures.

Good Use Hardware - Global professional supplier of chemical anchoring adhesive
If you are unsure which chemical anchor is most suitable for your application, please contact our team for expert assistance. You can submit your inquiry using the form at the bottom of this page.
- Chemical Anchor Showcase
-
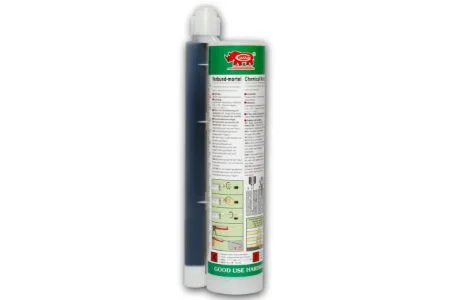
360ml Certified polyester chemical anchor for construction projects
GU-100 360ml
The 360ml polyester chemical anchor is a medium-sized option that offers greater flexibility...
Details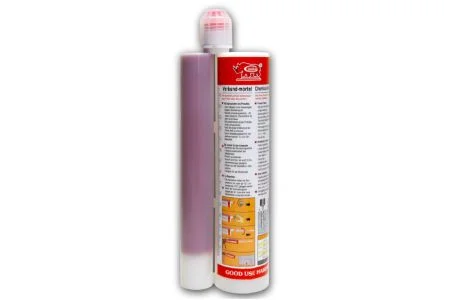
400ml Epoxy chemical anchor designed for use in tropical weather conditions
GU-500 400ml 3:1
This 400ml epoxy chemical anchor, in a 3:1 injectable cartridge, is designed for rebar connections...
Details
650ml Epoxy anchoring adhesive for high-temperature installations
GU-500 650ml 1:1
This 650ml, 1:1 ratio, slow-cure epoxy-based injection mortar is ideal for anchoring projects...
Details
345ml Premium quality epoxy acrylate chemical anchor for multiple fixing applications
GU-600 345ml
The 345ml epoxy acrylate chemical anchor is a popular medium-sized option for a wide range...
Details
345ml Low-shrink injection vinylester chemical anchor for reinforcing steel in concrete
GU-2000 345ml
345ml Vinylester Chemical Anchor – Ideal for Threaded Rod and Rebar Fixing The 345ml vinylester...
Details